6. Import
Bulk-load assets and their metadata into the catalog in a single operation — from a live database connection or by uploading a file.
The Import section (Data Management → Import) is the primary way to populate your catalog at scale. When you open it, Metaustral presents two paths:
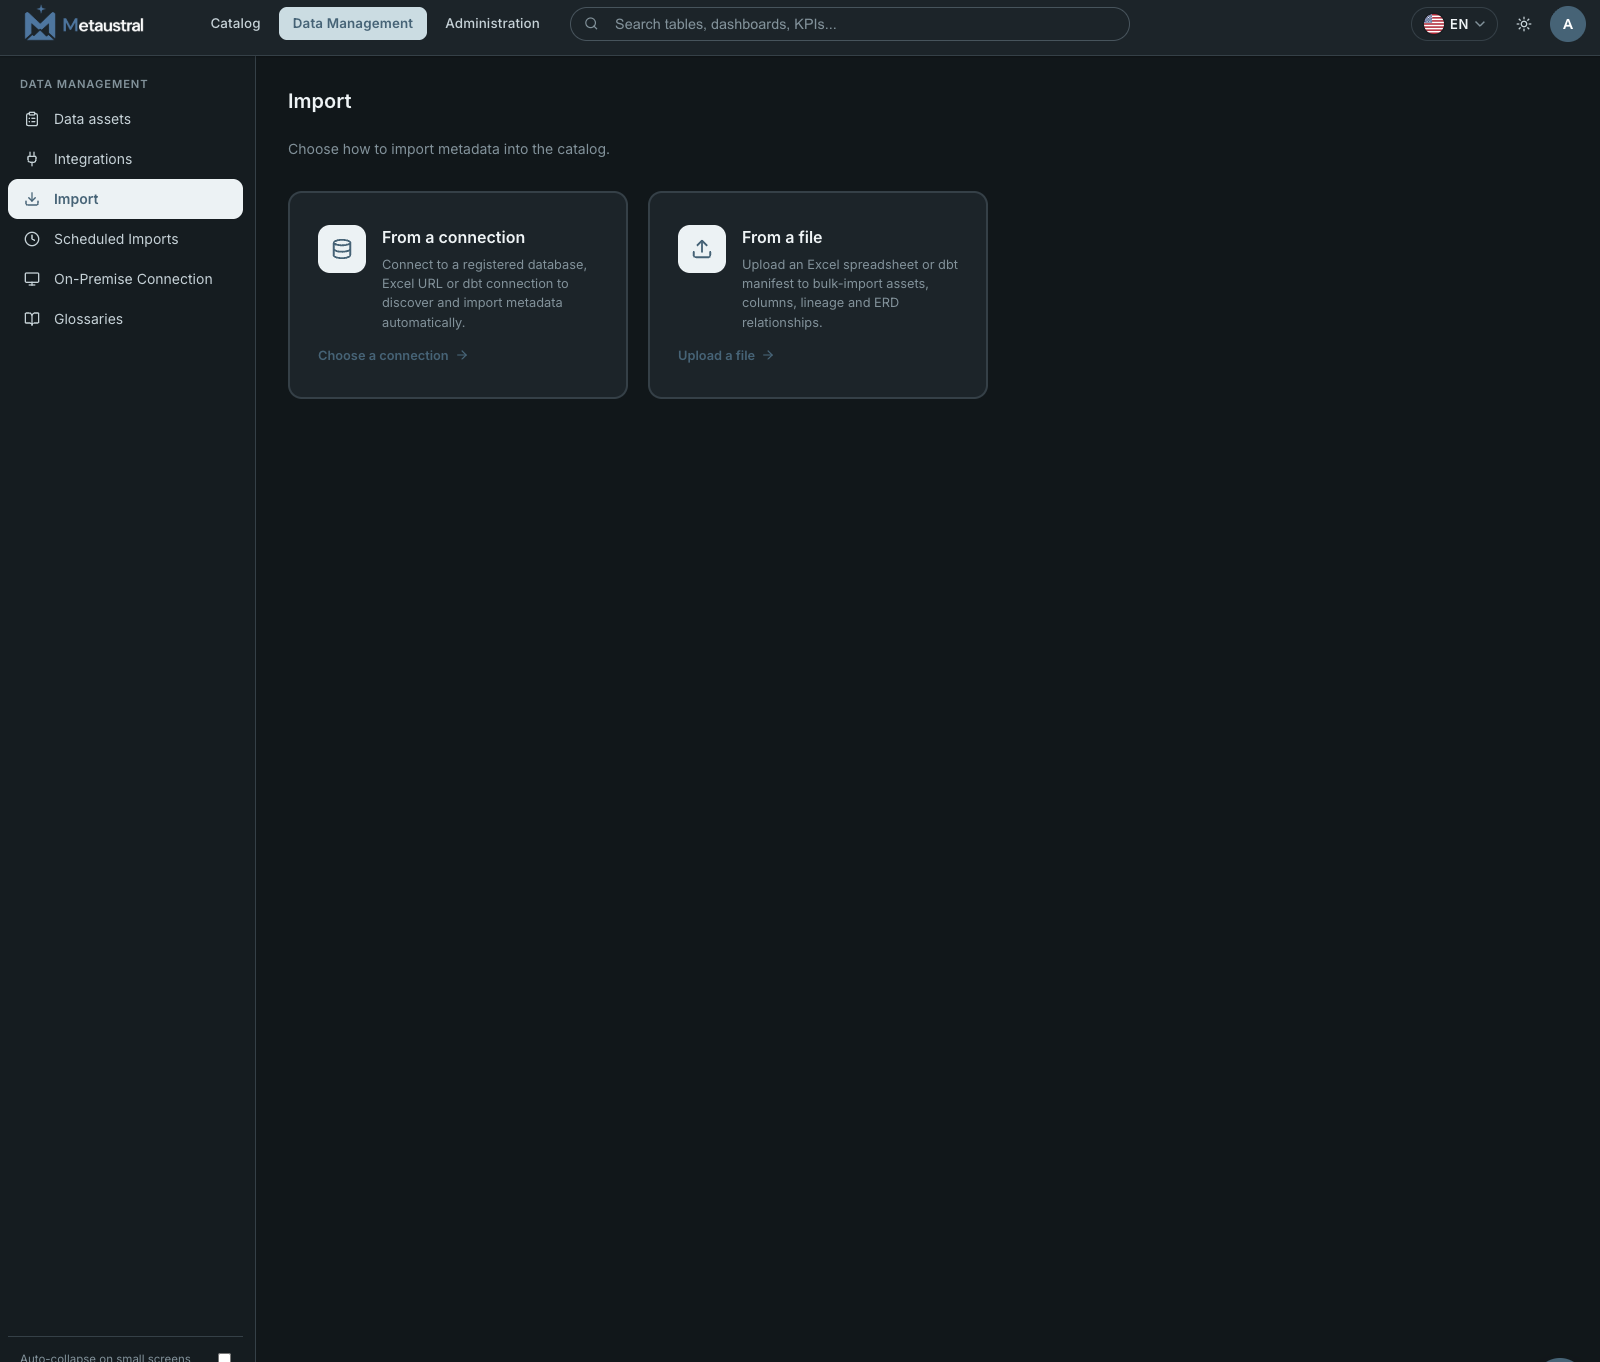
6.1 From a connection
This path connects to a registered data source and automatically discovers its tables, views, columns, and data types. Before using it you must first create a connection in Data Management → Integrations (see section 5).
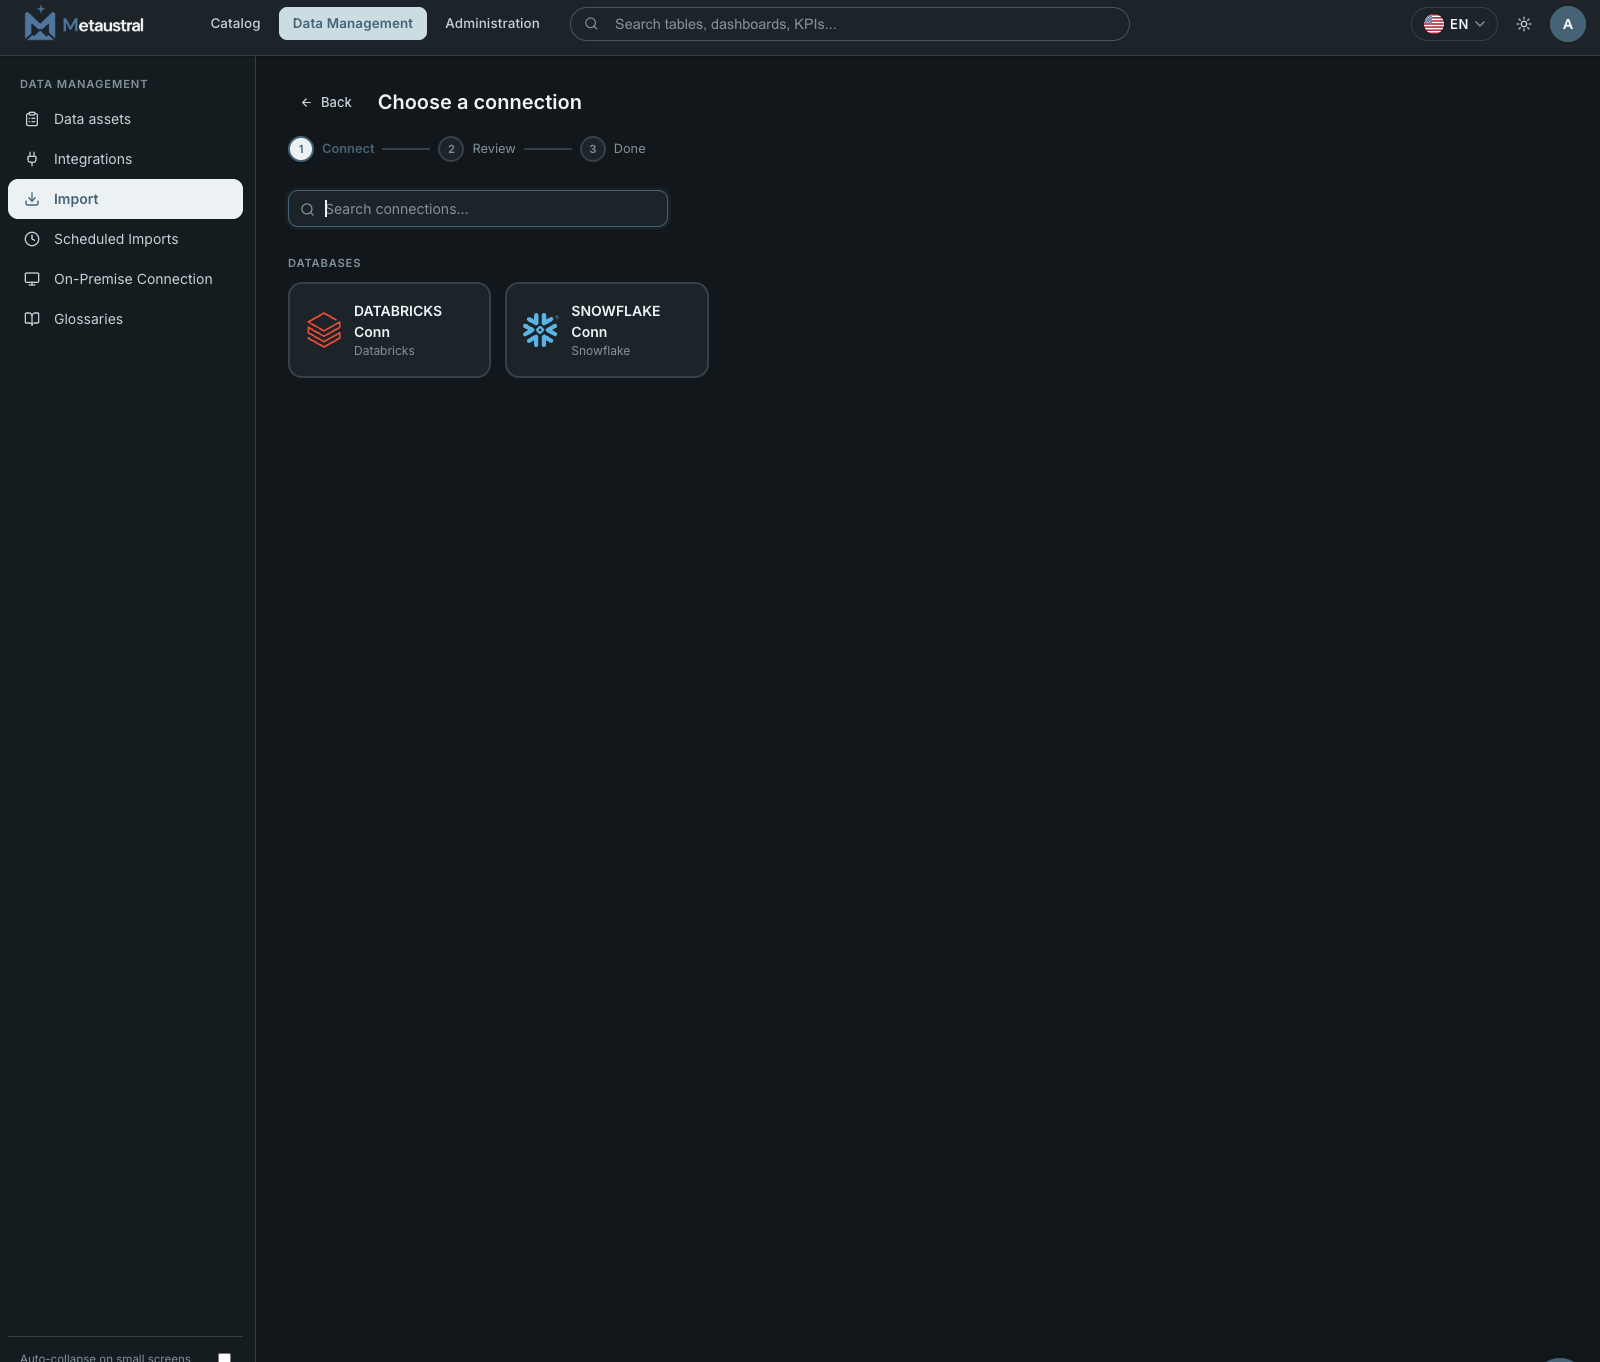
The flow has four steps: Connect → Browse schemas → Review → Done.
Choose a connection
All saved connections are listed grouped by type (Databases, BI Tools, File sources). Use the search box to filter by name and click the connection you want to import from.
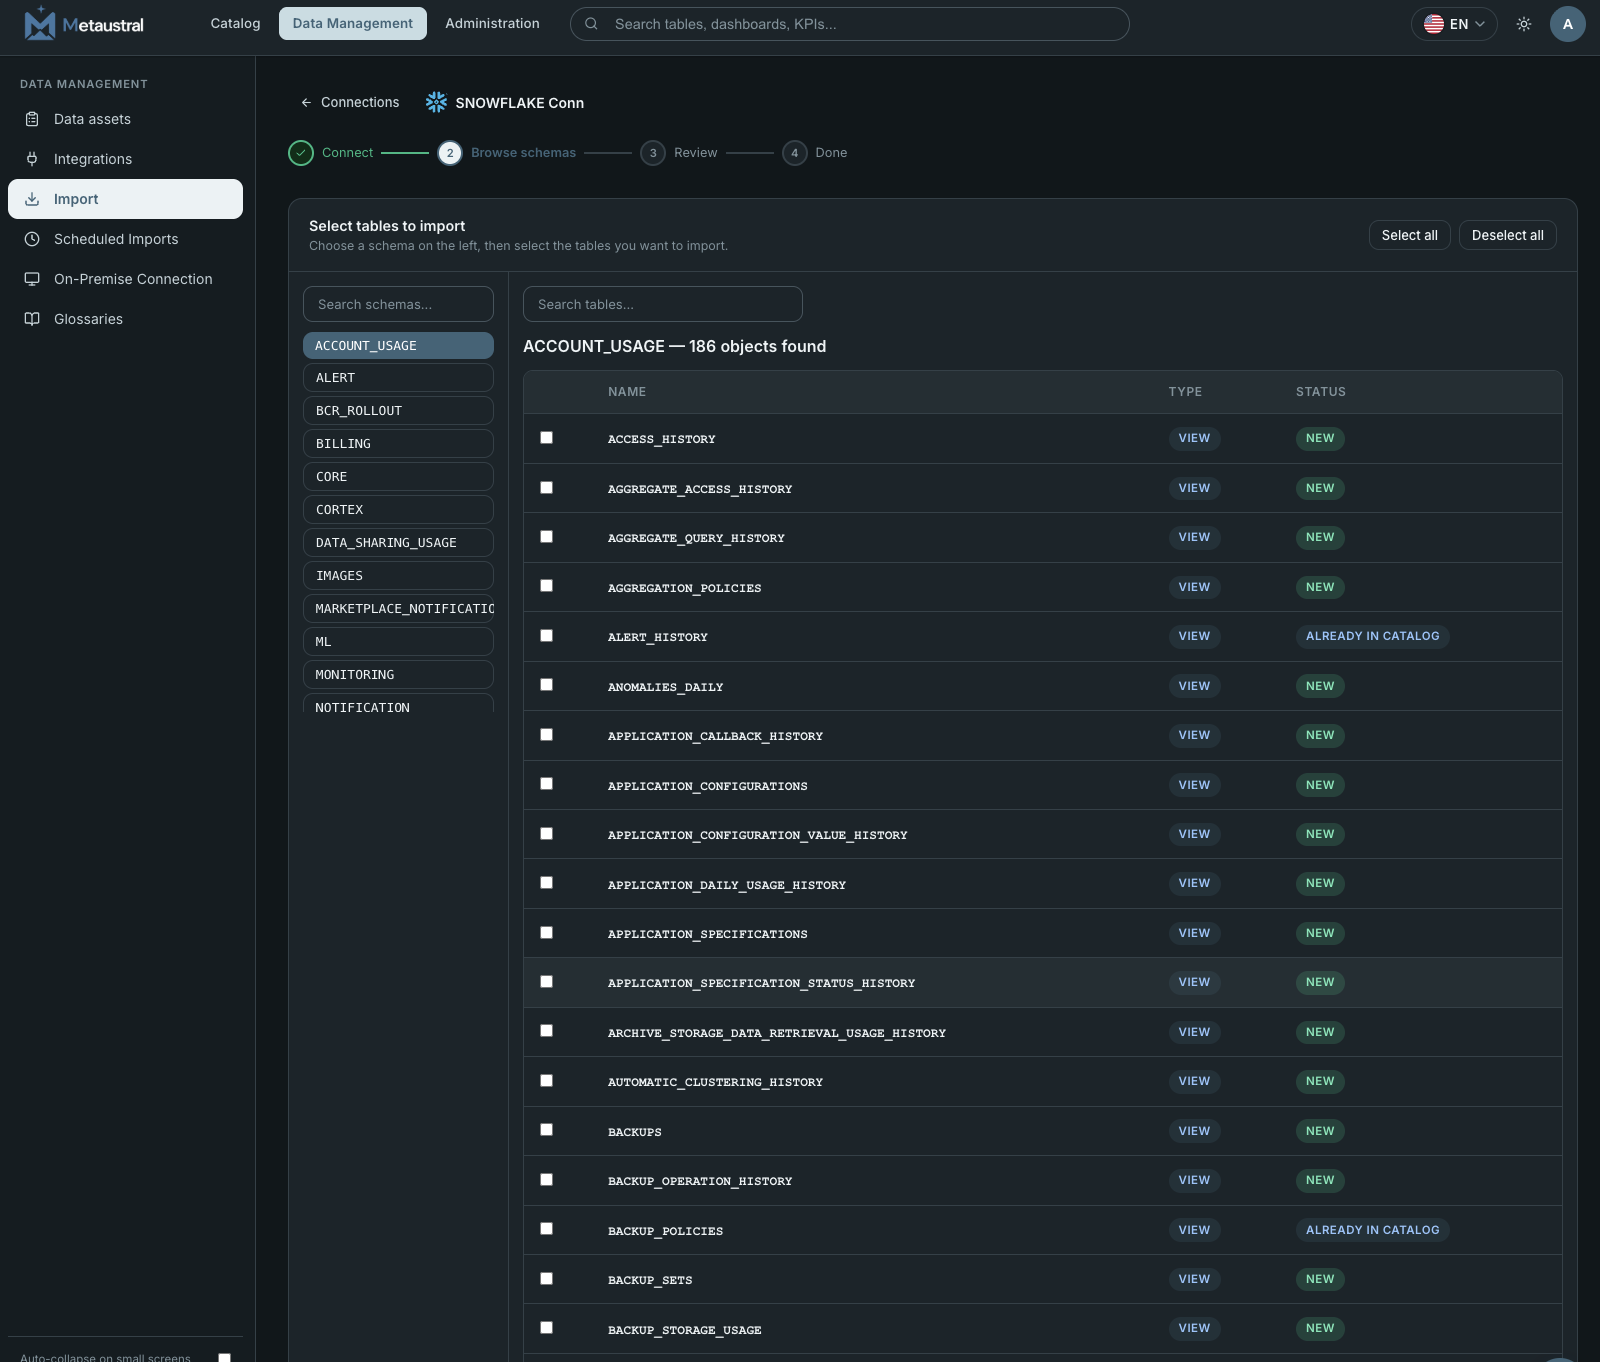
Browse schemas and select tables
Metaustral connects to the source and lists all available schemas in the left panel. Select a schema to load its tables and views on the right. Assets already in the catalog are marked Already in catalog; new ones are marked New. Select the rows you want to import — you can select all or individual items.
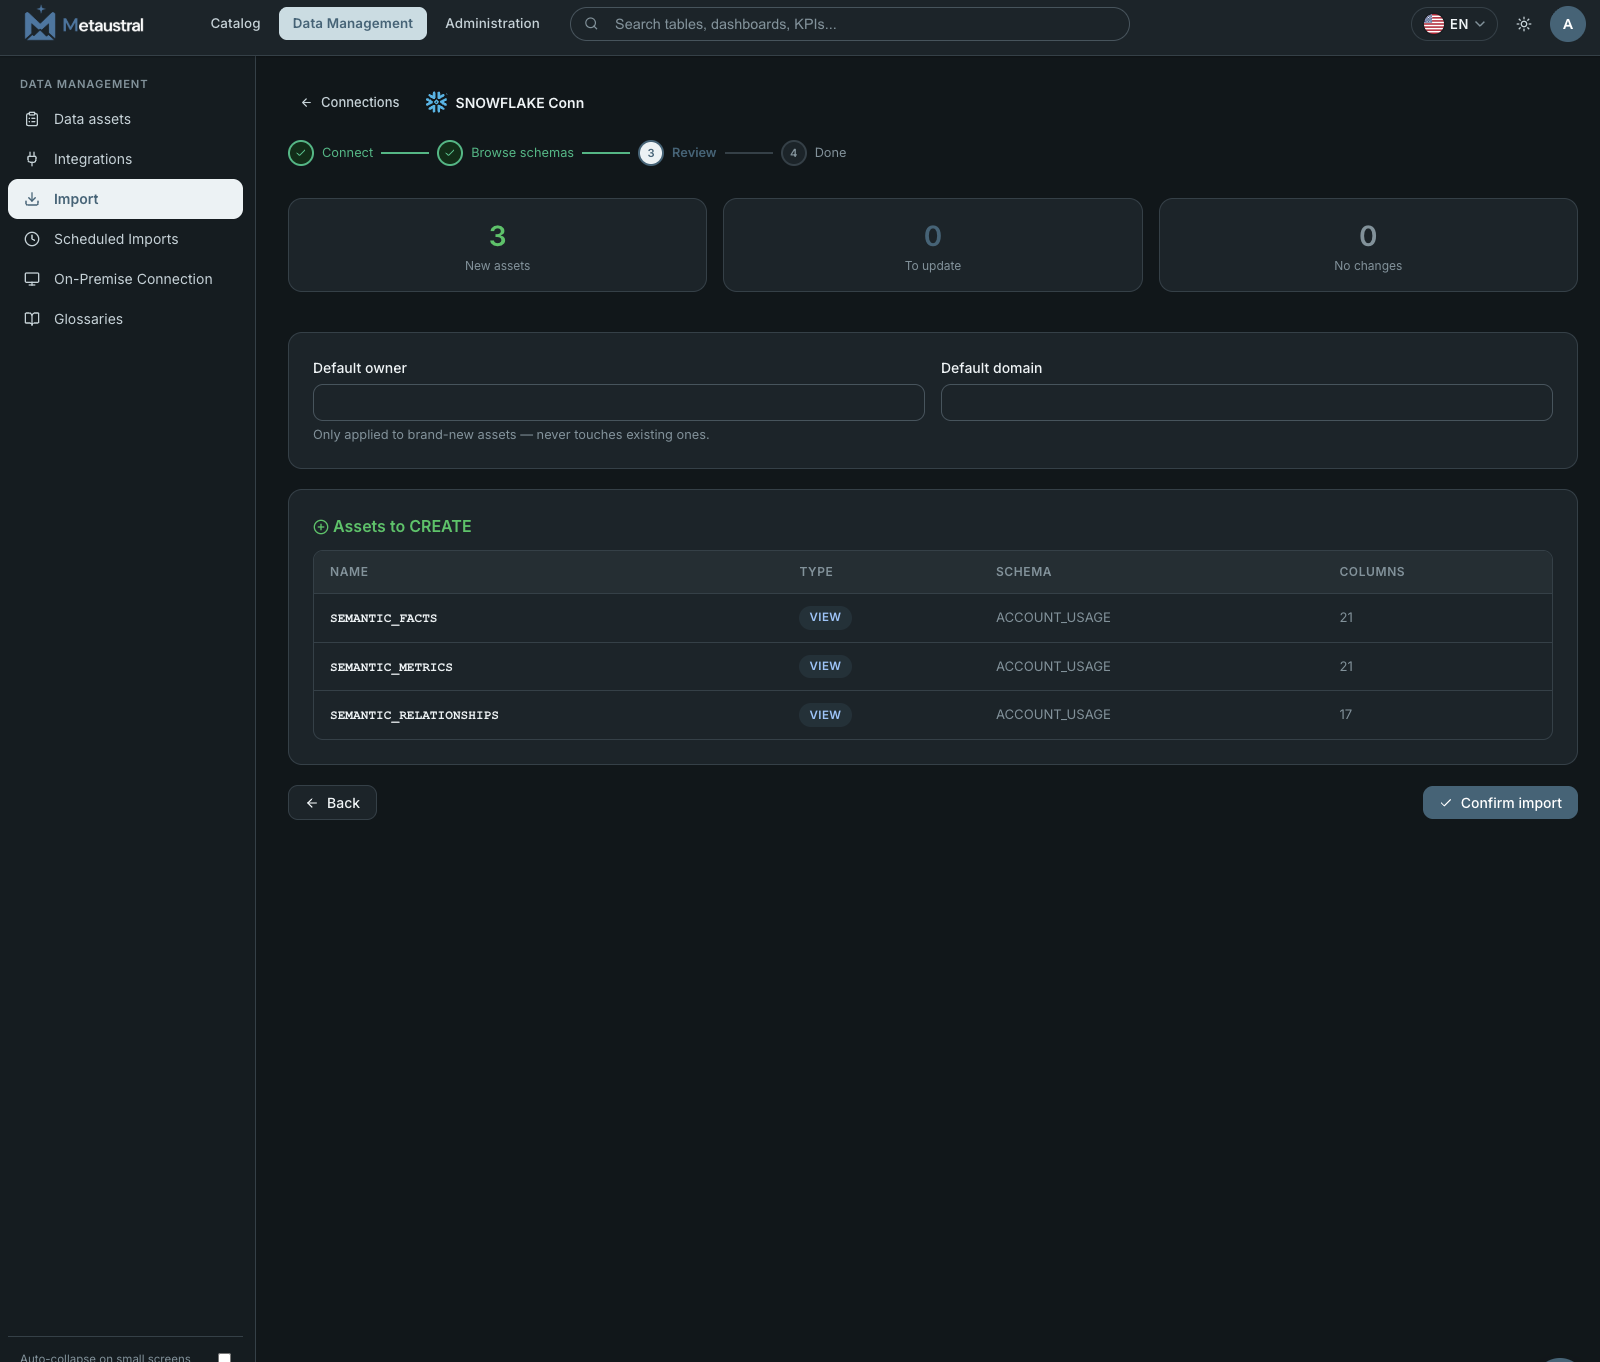
Review and confirm
The review screen shows a summary of new assets to create and existing ones to update, with their name, type, schema, and column count. You can optionally set a default owner and default domain to apply to all newly created assets. Click Confirm import to execute.
6.2 From a file
This path does not require a live connection. Instead, you upload a structured file that Metaustral parses to create or update catalog assets. Two file formats are supported:

6.2.1 Excel (.xlsx)
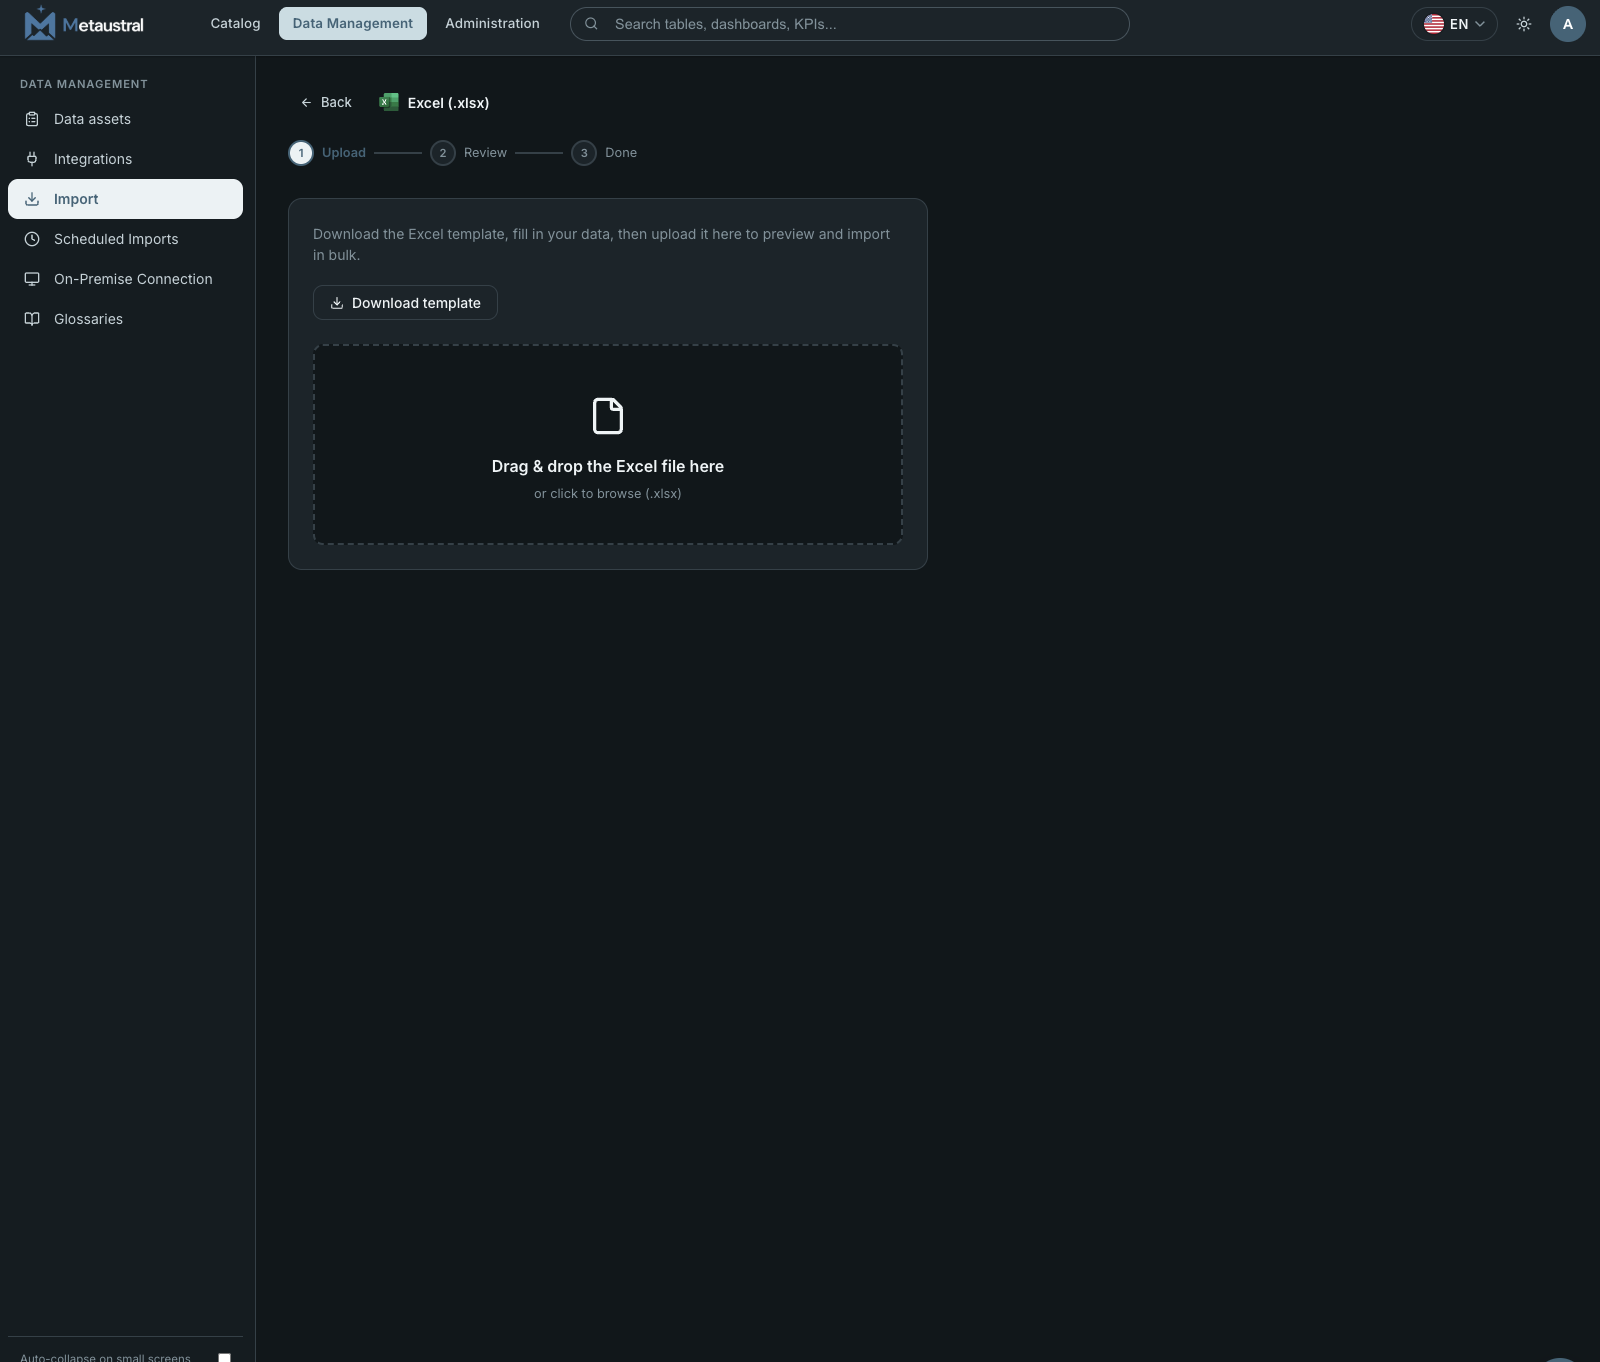
Download the official Metaustral Excel template directly from the import screen. The template contains multiple sheets — Assets, Columns, Lineage, and ERD — where you fill in your data. Once ready, drag and drop the completed file into the upload zone (or click to browse). The import follows three steps: Upload → Review → Done.
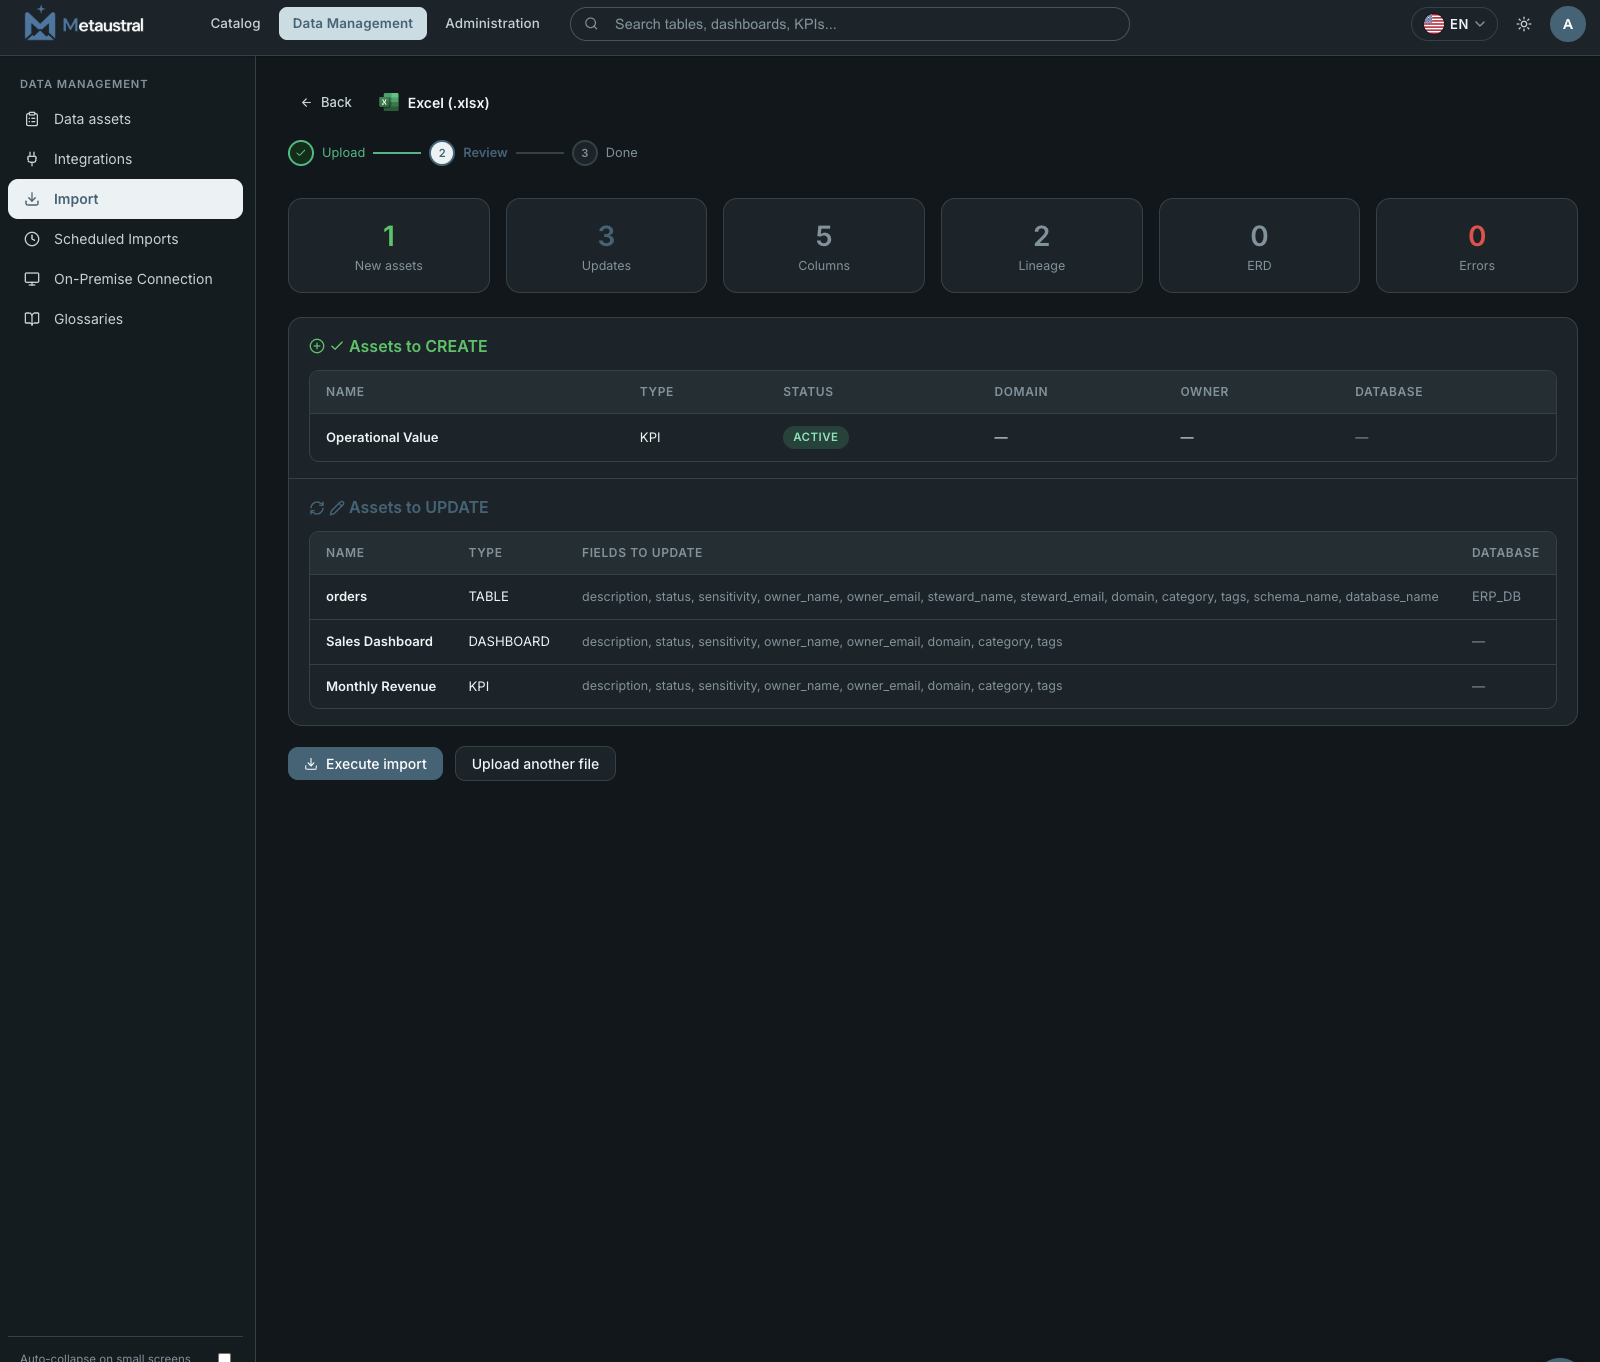
After uploading, Metaustral validates the file and shows a full preview before writing anything to the catalog. The review screen displays stat cards (new assets, updates, columns, lineage rows, ERD rows, errors) and two tables — assets to create and assets to update — with the exact fields that will change. Any row-level errors must be fixed in the file before the import can run.
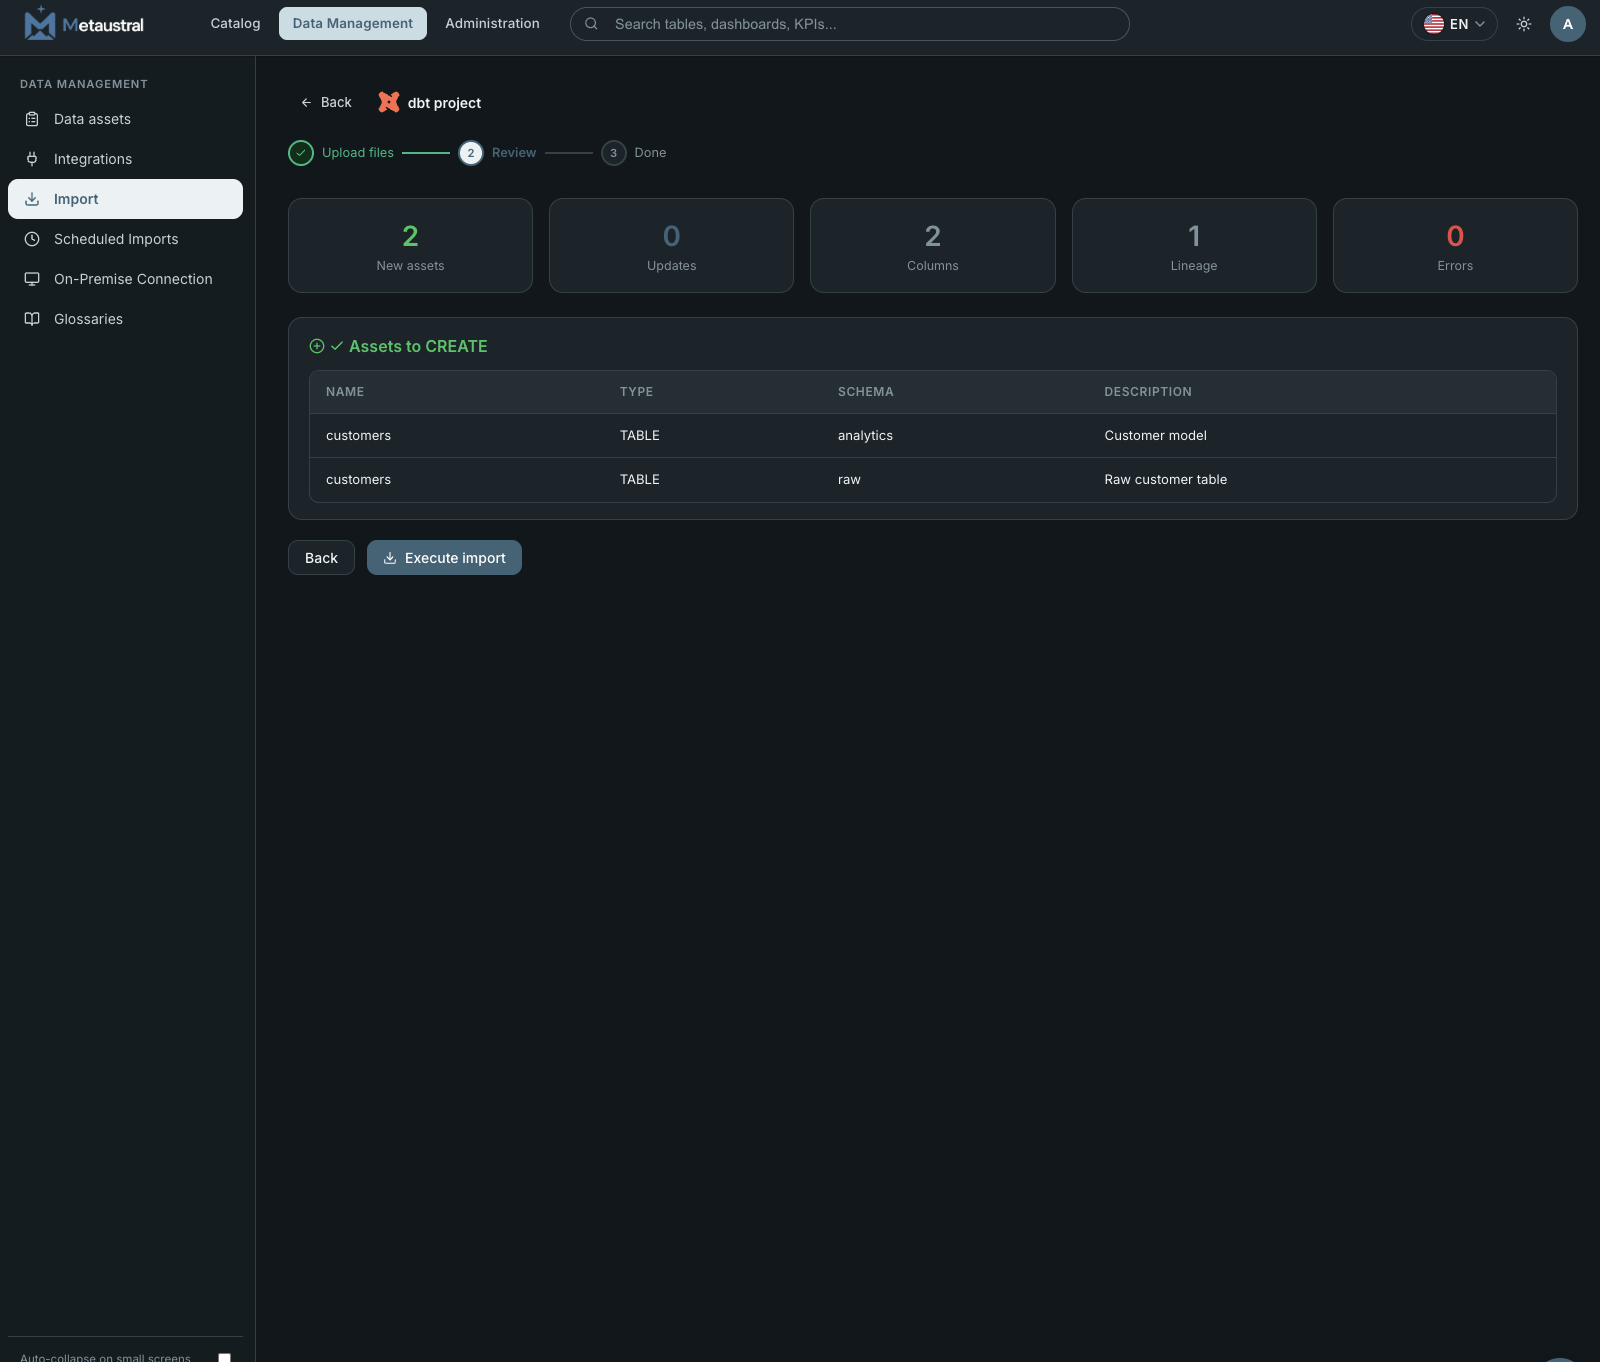
6.2.2 dbt project
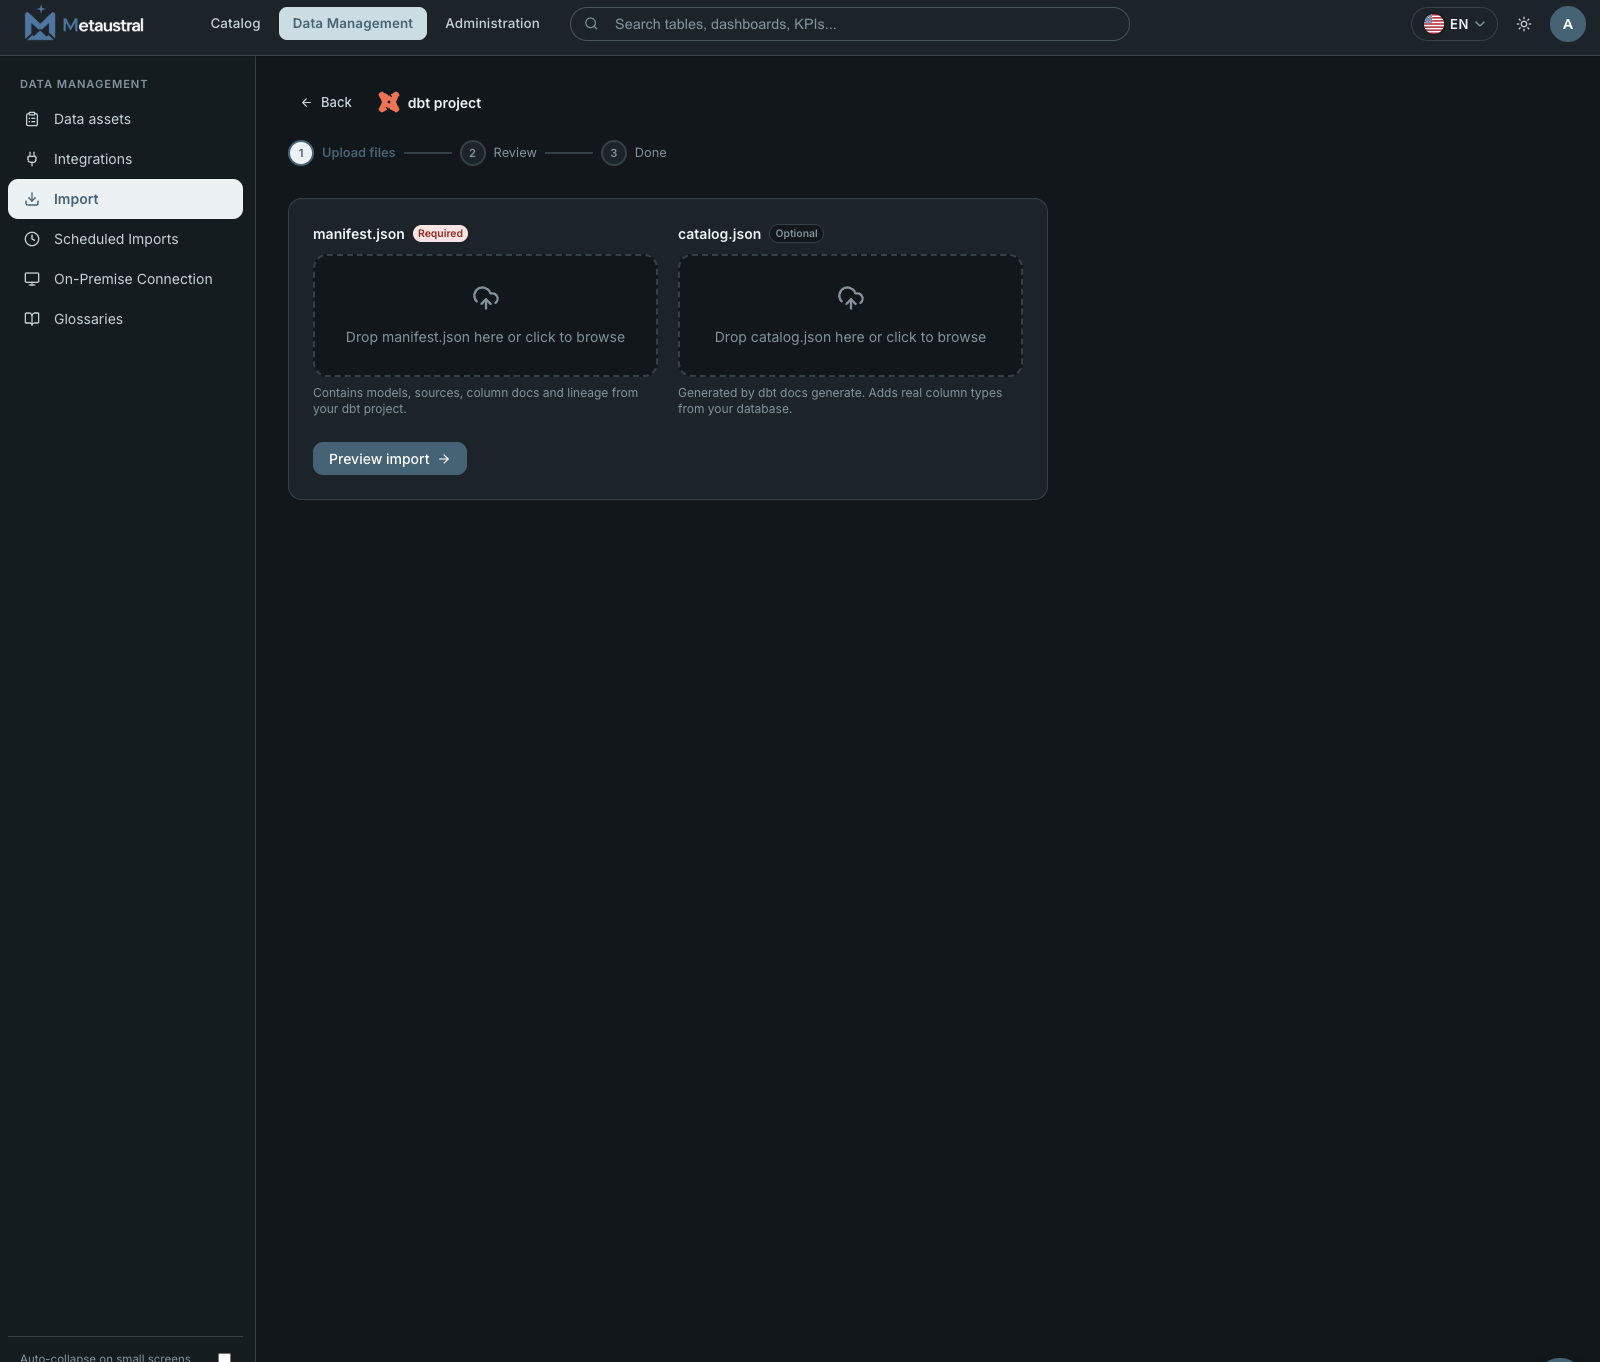
If your team uses dbt, you can import models, column documentation, descriptions, and lineage directly from the artifacts generated by your dbt project. Upload two files:
- manifest.json (required) — generated by
dbt compileordbt run. Contains models, sources, column docs, and lineage (DAG). - catalog.json (optional) — generated by
dbt docs generate. Enriches the import with real column types queried directly from your database.
After uploading, a review screen shows stat cards (new assets, updates, columns, lineage rows, errors) and the full list of assets that will be created. Click Execute import to apply the changes to the catalog.